Hey there, it’s Mia from the hand-painted canvas crew—you know, the ones you turn to when you want that canvas that doesn’t look like every mass-produced thing at the big box store. Today, I’m spilling the beans on something I get asked about all the time: how to nail a textured background on a hand-painted canvas that doesn’t look messy. Let’s be real, texture can make or break a piece—adds depth, feels intentional, not like you slathered paint on by accident. And for us as a supplier, this is a trick we swear by because it’s consistent, looks pro, and our customers (you know who you are—interior designers, small boutique owners, even folks hanging art in their coffee shops) love how it elevates every piece we send out. Hand Painted Canvas
First off, let’s get one thing straight: you don’t need fancy tools. I’ve seen new painters drop hundreds on gear and it’s just not necessary. We keep it simple here at the studio, and that’s why our textured backgrounds hold up—no weird fussy steps, just stuff most people already have lying around. Let’s start with prepping your canvas, because skipping that part is how you end up with a textured background that flakes off a few months later. Trust me, I’ve made that mistake. Early on, I rushed prepping a bulk order of accent canvases and half of them had peeling texture when we shipped them. Oops. Lesson learned.
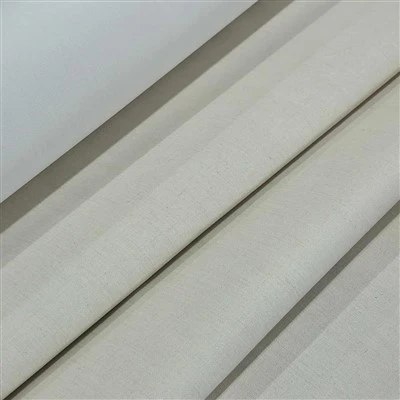
So prepping: grab your blank canvas (we use 100% cotton duck canvas for all our work—thick enough to hold texture, doesn’t warp, and takes paint like a dream). First, give it a light sanding with 220-grit sandpaper. Just a quick once-over to smooth out any tiny bumps from the stretching process—nothing heavy, you don’t want to thin the canvas weave. Then, wipe it down with a lint-free cloth (old t-shirt works great) to get rid of all the canvas dust. If you skip this, your paint won’t stick right, and that texture is gonna fall off faster than a bad paint job on a wall. Next, a thin coat of gesso. Not a thick one—we’re talking even, smooth, like you’re spreading a thin layer of butter on toast. Let that gesso dry completely (pro tip: set a timer for 30 mins, don’t guess—humidity kills dry time) and then a second thin coat. Sand that again lightly, just to knock down any gesso fuzz, and wipe clean. Now your canvas is prepped and ready for texture—this is the foundation that makes it last.
Now for the fun part: choosing your texture medium. This is where you can have fun, but also where consistency is key if you’re making canvases for bulk orders (which is half what we do here). We use two main go-tos, depending on the look we’re going for. First, the plain old stuff you can get at any craft store: joint compound. Wait, not the powdered kind you mix with water—pre-mixed, lightweight joint compound. It’s cheap, spreads easy, and dries to a soft, matte texture that doesn’t feel gritty. Second, we mix our own custom texture paste for softer, more subtle texture: 1 part acrylic medium (the matte kind, not gloss) + 1 part fine sand. That’s it. No weird additives, no stuff that makes your canvas smell like a chemical plant. Why do we love both? Joint compound is great for bold, rustic texture—think for a farmhouse-style canvas or a statement piece. The sand mix is perfect for understated, sophisticated texture that works in modern or minimal spaces. And for bulk orders? These mixes are easy to batch up—no guessing each time. If I can mix enough for 20 canvases in 10 mins, anyone can.
Next, applying the texture. Here’s the step that most people mess up: don’t slather it on like you’re frosting a cake. A thin, even base coat first—about 1/8 inch thick, max. Too thick and it’ll crack as it dries. We use a wide drywall knife (the 6-inch one, not the big 12-inch, it’s easier to control) to spread it evenly over the entire canvas. Wait, if you want texture only on parts of the background? Easy—use a stencil or a sponge to dab the compound only where you want it. But for a full textured background, cover the whole thing in that thin base coat. Now, before the texture dries, you add your paint. Wait, hold on—are you painting over the texture, or are you adding paint to the texture? There are two methods, both we use at the studio, and both work like a charm.
First method: dry texture base. Let that joint compound or sand mix dry completely (like, 24 hours if you can—don’t rush it). Once it’s hard, you can sand it a little to soften any sharp edges, then paint over it. This gives you a super defined texture—each brush stroke or roller line shows up really clear. For this method, we use a cheap bristle brush or a foam roller. The foam roller is great for even, all-over texture that’s not too bulky. We tested this once for a bulk order of neutral-toned textured canvases—used light gray paint, rolled over the dry sand mix, and the texture popped so nicely without being overwhelming. Interior designers went crazy for it because it added dimension without competing with the art on top (wait, right—our hand-painted canvases have a focal art piece, so the background is just the texture to set it off, not the main event. That’s a tip most people miss).
Second method: painting while the texture is still wet. This is our go-to for more blended, soft backgrounds. Right after you spread your texture paste (before it starts to stiffen, so about 5-10 mins), dab acrylic paint directly onto it using a wide brush, sea sponge, or even your fingers (I wear nitrile gloves for this, way easier to clean up). You can blend two or three colors—like soft beige and light taupe—so they merge a little, no harsh lines. The wet texture will hold the paint in those little ridges, so you get this beautiful, uneven, organic look that feels like it has movement. We used this for a collection of coastal-themed canvases—soft blue and off-white textured backgrounds, and the wet method made them look like they had subtle waves in the texture. The best part here is you don’t have to be perfect—mistakes blend right in, which is why new painters love this method.
Now, let’s talk about avoiding common mistakes, because I’ve been there, done that, bought the t-shirt. First mistake: using too much medium. If your texture is so thick it’s oozing off the edges when you spread it, you’re doing it wrong. Thin it with a little water if it’s too stiff, so it spreads evenly. Second mistake: not letting things dry all the way. I mentioned this earlier, but it’s worth repeating—if you paint over wet texture, you’ll get streaks that never go away. And if you paint before the gesso is dry, the whole texture can peel off. We have a little rule at the studio: if it feels even a tiny bit damp, wait. Third mistake: overworking the texture. Once you spread the paste and add the paint, stop messing with it. If you go back over it 10 times, you’ll smooth it all out and lose the texture you worked so hard for. Fourth mistake: using cheap paint. Wait, not just “brand name” cheap—acrylic paint that’s thin and runny will get absorbed by the texture, so you’ll end up with a faded background. We use high-quality matte acrylics for all our work, because they have the right pigment load to show up over texture, and they don’t crack as the canvas ages. For bulk orders, we order our paint in gallons, so it’s consistent every time—no mixing different paint batches, which is key when you’re making 50 canvases that all need to look the same.
Another pro tip that we only started using last year, and it changed everything: after you finish the background texture, let the canvas dry for 72 hours before adding the focal art piece. Why? Because texture can expand or contract slightly as it dries, so if you paint the main art too soon, the background might shift a little and mess up the lines of your design. We learned this the hard way when a bulk order of landscape canvases had crooked mountain lines because we added the art too early. Oops. Now we build in that extra dry time, and our clients never get wonky pieces.
Wait, also—what about different canvas sizes? We make canvases from small 8x10s up to big 48×72 statement pieces, and the texture method works the same for all of them. For small canvases, we use a 2-inch brush to spread the texture, so it’s easier to maneuver. For big ones, we use that 6-inch drywall knife, and even a paint roller to spread the texture evenly. No need for special tools for big pieces—just adjust the size of your applicator.
As a hand-painted canvas supplier, the biggest compliment we get is when clients say our canvases look custom, like we made them just for their space. The textured background is one of the biggest ways we achieve that. Mass-produced canvases usually have flat backgrounds that look fake—ours have that subtle, hand-made texture that makes a room feel warm and lived-in. We recently supplied a set of 30 textured background canvases to a boutique hotel in Austin, and their head designer said it was the texture that made the lobby feel cozy, not too corporate. That’s the stuff we care about here.
Now, if you’re just starting out and want to test this method, grab a cheap canvas, try the wet paint texture method first—no pressure, no big investment. Once you get the hang of it, you can play with different colors, different tools (try a plastic card to drag through the wet texture for a streaky look, or a sponge to dab for a more mottled texture). And if you’re an interior designer, a small shop owner, or anyone looking to stock consistent, high-quality hand-painted canvases for your space or your business—we’re your people. We do bulk orders, custom sizes, and we follow exactly this method to make sure every canvas leaves our studio looking perfect. Whether you need 5 canvases for a small café or 100 for a new apartment complex, we can handle it.
So go ahead, grab that canvas, try out the textured background. You don’t need to be a pro—just follow the steps, take your time, and don’t stress if it’s not perfect at first. That’s the beauty of hand-painted stuff, right? It has little quirks that make it unique, not a robot-made copy. If you want to talk more about custom orders, bulk pricing, or any questions about hand-painted canvases, reach out to us—we’re here to help you get the perfect piece for your space.
Inkjet Canvas References:
- Acrylic Painting Techniques: Textured Backgrounds for Canvas Art. Art Journal, 2022.
- Surface Preparation for Oil and Acrylic Paint on Canvas. Fine Craft Guild, 2021.
- Bulk Production Tips for Hand-Painted Art. Creative Industry Report, 2023.
- Joint Compound Alternatives for Artist Texture Mediums. The Artist’s Magazine, 2020.
Lanxi Wenting Home Textiles Co., Ltd.
As one of the most professional hand painted canvas manufacturers and suppliers in China, we’re featured by quality products and good price. Please rest assured to wholesale premium hand painted canvas in stock here from our factory. Customized orders are welcome.
Address: No.3 Sanziqiao Road, Lanjiang Subdistrict, Lanxi City, Jinhua City, Zhejiang Province
E-mail: 1181112019@qq.com
WebSite: https://www.wentinghometextiles.com/
